Sunday, November 3, 2013

Check out this awesome Giveaway!

Laura Okita, model and vintage designer extraordinaire at PaperMothballVintage, is offering this awesome Giveaway!

Check it out as her site, or use the rafflecopter widget below:

a Rafflecopter giveaway

Till next time,--Ayana

Wednesday, October 30, 2013

The Big Day!

 Photo: www.JessicaNewtonPhotography.com

Please feel free to tag and share! Please do not crop or edit photos. Please do not print photos from Facebook(just ask me for the high resolution ones =))


I've been a little stuck with blog writing.  First, because the three weeks leading up to The Big Day were so busy.  Now, because it's over, it feels strange going backwards in chronology to show How I Made The Dress.  And, now that The Big Project is finished, I've been a bit adrift on What to Tackle Next (sewing-wise, at least).  So today, on our eleven-day anniversary (seriously, we've been teasing each other like this for a week now) I decided to just get back into the swing of things.

Since the most important thing is that I Finished The Dress, and I'm very happy with how it looked, I thought I would just post here some of the photos from The Big Day (and the day before).  Our professional photos aren't ready yet, other than a few sneak peeks, so mostly these are snapshots taken by family.

Final Hand-Sewing

Photo: Last minute wedding dress sewing...
 
I love how the blurriness conveys the sense of activity.  But I actually felt calm, I promise!

My Mom crocheted a lace border for the top of the dress


The lace, while subtle, gave The Dress just the perfect final touch!  Thanks Mom!  Your creativity has inspired me since you first taught me to hand-sew, embroider, and knit at age eight.


On the Way *Almost There*

 
This isn't me, by the way!


Helping Little Miss

 
I used an extra bit of ribbon as a stay at the top of the dress, but Little Miss decided it worked better as a halter strap that tied in the back.  I also re-purposed a frilly ribbon for her waist, that I had originally intended as a waistband for a tulle overskirt for my own dress.  My Mom and my sister nixed that idea.
 

Little Miss is Adorable!


Just About Ready

I decided to make a veil at the last minute (late the night before).  I attached it to two beaded hair combs I had made with gold and white freshwater pearls the week before.  Little Miss also made two hair combs for herself.  I had so much fun, I made extras for my two bridesmaids and my sister in the days before the wedding.


 The Ceremony Was Beautiful!

My Pilot picked this incredible bouquet from the garden in the morning.  I had just finished wrapping what I thought would be my bouquet when he came in with it.  I gave my roses to Little Miss. 
 
My sister brought the necklace for me; we had fun trying on all the options the day before.  She is so wonderful!
 

Two New Sisters


 My Parents

A Moment of Hilarity! (This always happens when I get together with my sister, or with my friends; so here, it was a guaranteed fun fest!)


We're Married!

It was an incredible, amazing, blessed day at Brown County State Park, Indiana!


Till Next Time,--Ayana


Sunday, October 20, 2013

Wedding Reception Table DIY Design


So, this isn't sewing related, but it (and a few other posts I have planned) helps document some of my other DIY projects for the wedding.

I created two reception table arrangements for our guests to sign in as they entered and greeted us, and to share something about us as a couple.

The Pilot purchased a large square matte for our guests to sign--instead of a guest book--that we can use to frame a special wedding photo and create a new family-centered display over our mantelpiece.  This was placed at the entrance to the reception so guests could "sign in" while waiting to greet us.

The second table was placed just inside the reception area.  Here we displayed some family photos.  At the center we placed a mosaic of photos I took on one of our hikes in Brown County State Park--the site of our wedding--surrounding one of the first photos taken of us as a couple. 


Framed mosaic of photos surrounding wedding couple
DIY Wedding Reception Table Centerpiece
Surrounding this centerpiece, we grouped 5x7 photos of us as a couple, and four 4x6 photos that spelled "L-O-V-E."  These last four I created using graphics from Publisher, saved them as jpg, opened them in Picasa, then centered the letters in an italic font in bold in the largest font size available.


All of these Little Miss helped me frame for display!

What a great way to share our new family's connection with each other, with the site of our wedding, and give our guests a glimpse of us as a couple!


Wedding Reception Table DIY Decoration--"LOVE"

Till Next Time--Ayana


Tuesday, October 1, 2013

The Cream Puff Dress--Done!

Hi folks, I'm so excited!


The Cream Puff Dress on the Wedding Day
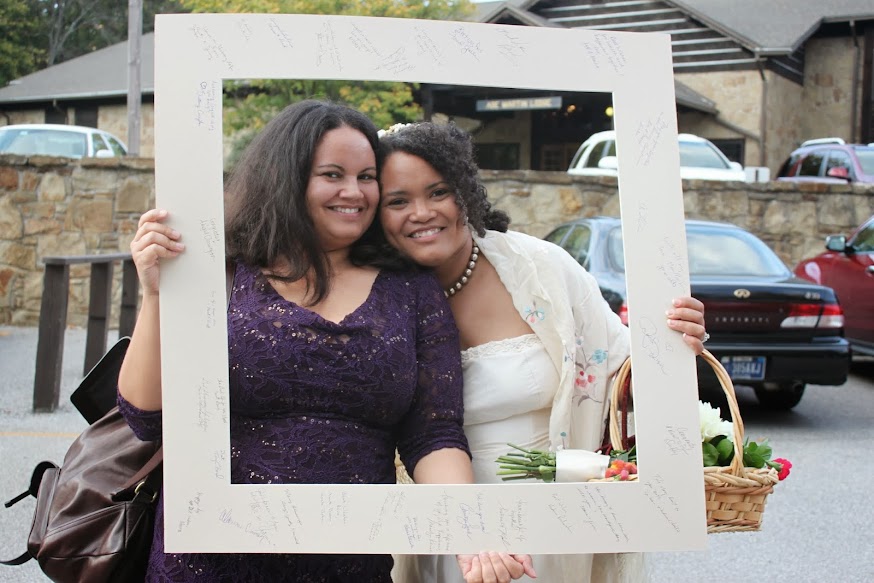
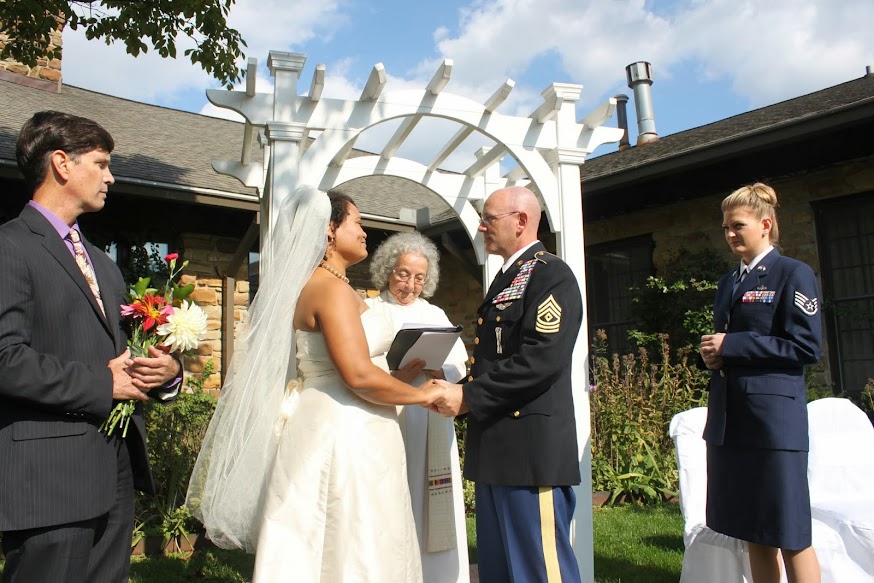
This photo is from the actual wedding day!
The Cream Puff Dress
I finished the Cream Puff Dress, and it looks amazing!  (If I must say so myself.  I suppose I shouldn't toot my own horn, but I just can't contain myself here.)


Here are the steps that went into this project:


1.  Pattern Drafting

2.  Pattern Printing and Assembling

3.  Pattern Testing/Fitting by Making the Bodice Lining

4.  Fabric Cutting

I decided to underline/flat line the dress, for two reasons: 

  • I wanted to give the fabric slightly more substance, so the garment wouldn't feel flimsy,
  • and I wanted to enhance the creamy ivory color--I wouldn't use the term sheer by any means to describe this fabric, but it seemed like when I put my hand directly underneath it, the color of my skin kind of influenced how I perceived the color of the fabric. 

I cut a very small piece of the silk from the selvedge, and ironed a piece of fusible interlining to it, but didn't like the results.  It was a little too stiff, and a little too "gummy"--maybe I didn't have the right weight of interlining.

I tried the same experiment with a new swatch, using some scraps of cotton batiste I had on hand.  This worked perfectly.

So I cut out each pattern piece in both the silk and the cotton batiste, and sewed them as if they were one layer. 

You're supposed to baste the two fabrics together in a line running up the middle first, but I didn't want to do this, because I've read that needle punctures can destroy silk.  I didn't want to take any chances.  So I simply pinned them together in the seam allowances. 

I had to remove the pins before sewing the seams, though, because of the curved areas; the fabric needed to shift while sewing in order to match the curves, especially when sewing a curved area to a straight area.

5.  Sewing! 

The actual sewing was the easiest part of this project.  One of the benefits of creating your own pattern is that you know exactly how it goes together, and you can control the difficulty level. 

So, my pattern for the Cream Puff Dress involved only five seams, sewing in the bodice lining, inserting the back lacing, and hemming it up.  Easy peasy, more or less!

The hard part is creating the pattern (but even that wasn't so challenging, just exacting), and cutting the fabric.  What's interesting though, is that for the first time ever I figured out how to get into a type of zen mode so that the tasks I would normally consider frustrating were actually enjoyable.  I discovered that if you do it with love, nothing is stressful.

Also, I discovered that pressing is even more fun than the actual sewing machine sewing.  Once you've sewn a seam, every other seam is the same--you're just feeding the fabric through.  But pressing--that's where the garment takes shape.  And, that's where you get to see the beautiful results of all your hard work.

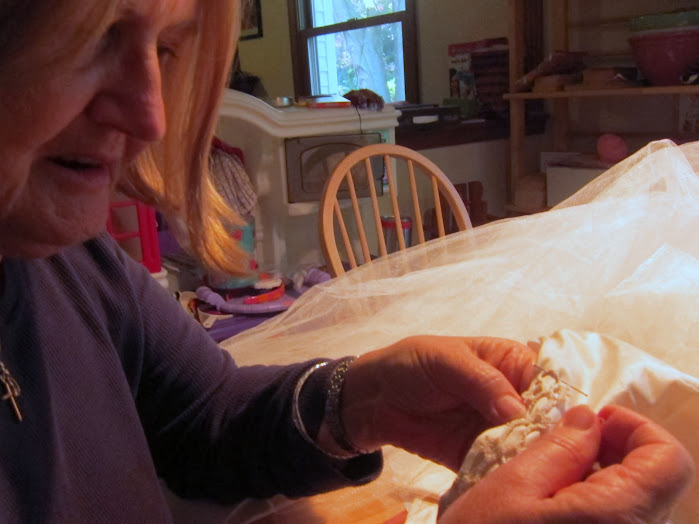
6.  Sewing in the Bodice Lining

This step was fairly easy, too.  I made a fortuitous last-minute decision. 

As I was rummaging through my bag of notions, I came across some white double fold bias tape for seam binding.  Although I had intended to simply sew the lining to the dress the same way you would sew a regular seam, and then turn it right side out, I decided to use the bias tape to enclose the layers at the top. 

Then, when I turned the garment right side out, I flipped the bias tape over and pulled it downwards into the inside of the dress, so that the 1-inch seam measured correctly from the top, but now the lining is lower than the outer fabric.  This way the lining is not visible from the outside.  I pinned the lining down to the seam allowances to keep it from shifting.  I only actually sewed it in at the back seam, but not until after inserting the back laces.

7.  Inserting the Laces

I created two strips of laces for the back closure.  Each strip consists of 2 layers of fusible interfacing and 1 layer of silk,  11 inches by 1 inch.  The silk is underneath, then one layer of fusible with the glue towards the silk, on top of which I pinned 11 one-inch lengths of ribbon spaced 1 inch apart, along the middle of the strip.  On top of this is the second layer of fusible, with the glue towards the ribbon.  I pressed, sealing all the layers together.

I attached each panel of laces to the seam allowance of the back seam.  Keeping the silk layer towards the body, I wrapped the half of the strip around towards the back of the seam allowance, fully encasing it.  To keep it stable, I will stitch down the edge of the seam allowance to the lining layer on the inside, while inserting boning.  This will keep the fabric from bunching up when I tie the laces.

Update:  There was just one problem, which will cause me to take out the lacing panels and re-sew them.  Although I removed an inch from the back closure by folding the seam allowance back a full inch, instead of a half inch, at the top of both sides, then tapered down to the half inch at the top of the back seam, the dress would not lace tightly enough.  This is partly because of how far the ribbon laces protrude from the side. 

I will need to make the gap probably a full two inches at the top, and make the ribbons much tighter against the edge.

Oh well, this is one more evening's worth of work....

Otherwise, it's looking great!

Till next time, --Ayana


Monday, September 30, 2013

New Feminine Black and White Patterns from Burda Style


Recently, Burda Style blogged these gorgeous patterns from their 2012 magazine.  I want all of them!

http://www.burdastyle.com/blog/screen-siren-8-sexy-plus-size-patterns

#1:  Lace Dress:


A fitted, cap sleeve dress with straight skirt and flattering style lines.  This dress alone is a wardrobe staple, and could be made in various fabrics--it's a good idea to pick a pattern that you like and make it in different fabrics, and with small variations, to create a streamlined wardrobe; plus, each time you make it, it gets easier.  You know the adjustments, and only have to fit the pattern once.  However, I hate the peplum!  Good thing it's removable!

#2:  Bow-tie Collar Blouse:


 This is also a fairly standard blouse, but with a few elegant details:  slightly gathered sleeves at the "cuff" and a tie at the collar.  I actually hate clothes with bows on them--what are we, eight years old?  Come on, being juvenile is not "feminine."  However, I like the way they style the tie on the model--instead of tying it, they've draped it inside the blouse so that the ends hang elegantly.  This works because the fabric is sheer and drapey.  Or, you could just eliminate the ties.

#3:  Faux Wrap Dress:


This is a classic outline--a slightly A-line shape, with a flattering faux-wrap and slight gathers at the bust.  A fabric with a slight amount of stretch would be ideal.  I find no fault with this one!  I want at least two of these!


#4:  Cap-Sleeve Dress


This is a simple but sweet look.   Another cap-sleeve style, with an A-line shape, this dress has gathers at the neck and armscye, flattering and elegant.
 

#5:  Fitted Skirt:

 
 What makes this stand apart is the lace--an elegant idea.  But wait!  I don't need to buy a pattern for this skirt--I can make my own!  So there. 
 
The blouse shown is also available as a pattern.  That one I would like--another basic wardrobe staple to be made in various colors and textures of fabric.  You can't go wrong with this one!


#6:  V-Neck Jacket:


 This works as either a blouse on its own, or as a light jacket with a shell underneath.  Personally, I prefer it as a blouse, because the V-neckline sits perfectly on the body and really doesn't need anything else competing with it.
 

#7:  Almost a Shirt Dress:


 What's great about this one is it looks like a classier version of the shirt dress.  It also looks like a blouse/skirt combination.  You might wonder, why do I need a shirt/skirt dress when I have so many shirts and skirt?  The answer is this, my friends.  When it's a dress, the blouse part always fits perfectly at the waist, it never "blouses" out, and it stays "tucked in."  Which all adds up to a sleeker, more figure-flattering look.  Especially with the belt, which for curvy types helps accentuate all the best features!
 
As I said above, I want all of these!  I started realizing yesterday that I might be a little bit sad after finishing my wedding dress project. 
 

So what better way to combat a touch of sadness, than to start another big project?


Yay! (Right?)


Till next time,--Ayana