Showing posts with label design process. Show all posts

Tuesday, October 1, 2013

The Cream Puff Dress--Done!

Hi folks, I'm so excited!


The Cream Puff Dress on the Wedding Day
This photo is from the actual wedding day!
The Cream Puff Dress
I finished the Cream Puff Dress, and it looks amazing!  (If I must say so myself.  I suppose I shouldn't toot my own horn, but I just can't contain myself here.)


Here are the steps that went into this project:


1.  Pattern Drafting

2.  Pattern Printing and Assembling

3.  Pattern Testing/Fitting by Making the Bodice Lining

4.  Fabric Cutting

I decided to underline/flat line the dress, for two reasons: 

  • I wanted to give the fabric slightly more substance, so the garment wouldn't feel flimsy,
  • and I wanted to enhance the creamy ivory color--I wouldn't use the term sheer by any means to describe this fabric, but it seemed like when I put my hand directly underneath it, the color of my skin kind of influenced how I perceived the color of the fabric. 

I cut a very small piece of the silk from the selvedge, and ironed a piece of fusible interlining to it, but didn't like the results.  It was a little too stiff, and a little too "gummy"--maybe I didn't have the right weight of interlining.

I tried the same experiment with a new swatch, using some scraps of cotton batiste I had on hand.  This worked perfectly.

So I cut out each pattern piece in both the silk and the cotton batiste, and sewed them as if they were one layer. 

You're supposed to baste the two fabrics together in a line running up the middle first, but I didn't want to do this, because I've read that needle punctures can destroy silk.  I didn't want to take any chances.  So I simply pinned them together in the seam allowances. 

I had to remove the pins before sewing the seams, though, because of the curved areas; the fabric needed to shift while sewing in order to match the curves, especially when sewing a curved area to a straight area.

5.  Sewing! 

The actual sewing was the easiest part of this project.  One of the benefits of creating your own pattern is that you know exactly how it goes together, and you can control the difficulty level. 

So, my pattern for the Cream Puff Dress involved only five seams, sewing in the bodice lining, inserting the back lacing, and hemming it up.  Easy peasy, more or less!

The hard part is creating the pattern (but even that wasn't so challenging, just exacting), and cutting the fabric.  What's interesting though, is that for the first time ever I figured out how to get into a type of zen mode so that the tasks I would normally consider frustrating were actually enjoyable.  I discovered that if you do it with love, nothing is stressful.

Also, I discovered that pressing is even more fun than the actual sewing machine sewing.  Once you've sewn a seam, every other seam is the same--you're just feeding the fabric through.  But pressing--that's where the garment takes shape.  And, that's where you get to see the beautiful results of all your hard work.

6.  Sewing in the Bodice Lining

This step was fairly easy, too.  I made a fortuitous last-minute decision. 

As I was rummaging through my bag of notions, I came across some white double fold bias tape for seam binding.  Although I had intended to simply sew the lining to the dress the same way you would sew a regular seam, and then turn it right side out, I decided to use the bias tape to enclose the layers at the top. 

Then, when I turned the garment right side out, I flipped the bias tape over and pulled it downwards into the inside of the dress, so that the 1-inch seam measured correctly from the top, but now the lining is lower than the outer fabric.  This way the lining is not visible from the outside.  I pinned the lining down to the seam allowances to keep it from shifting.  I only actually sewed it in at the back seam, but not until after inserting the back laces.

7.  Inserting the Laces

I created two strips of laces for the back closure.  Each strip consists of 2 layers of fusible interfacing and 1 layer of silk,  11 inches by 1 inch.  The silk is underneath, then one layer of fusible with the glue towards the silk, on top of which I pinned 11 one-inch lengths of ribbon spaced 1 inch apart, along the middle of the strip.  On top of this is the second layer of fusible, with the glue towards the ribbon.  I pressed, sealing all the layers together.

I attached each panel of laces to the seam allowance of the back seam.  Keeping the silk layer towards the body, I wrapped the half of the strip around towards the back of the seam allowance, fully encasing it.  To keep it stable, I will stitch down the edge of the seam allowance to the lining layer on the inside, while inserting boning.  This will keep the fabric from bunching up when I tie the laces.

Update:  There was just one problem, which will cause me to take out the lacing panels and re-sew them.  Although I removed an inch from the back closure by folding the seam allowance back a full inch, instead of a half inch, at the top of both sides, then tapered down to the half inch at the top of the back seam, the dress would not lace tightly enough.  This is partly because of how far the ribbon laces protrude from the side. 

I will need to make the gap probably a full two inches at the top, and make the ribbons much tighter against the edge.

Oh well, this is one more evening's worth of work....

Otherwise, it's looking great!

Till next time, --Ayana


Tuesday, September 24, 2013

Corset Back Idea

I had another brilliant light bulb moment, folks! I decided to add a corset laced back to Little Miss' Creampuff Dress, and to my own Wedding Dress. 

I decided to do this after finding this awesome blog post with detailed instructions on how to do it. 


{Source}

The funny thing is, my original idea for my wedding dress was to start with a pre-existing corset, and add a gathered tulle skirt to it.  That would have worked, and would have been much simpler!

But then, I got bit by the sewing bug, and my imagination started running wild.  Then, I found blog posts that showed you how to draft your own corset pattern, so I experimented with making a corset-shaped top but using a zipper because I didn't want to actually cinch my waist.


{Source}
After experimenting with that for a bit, with some good results, I realized, why use a waist seam?  Just one more thing to sew!  That's how I came up with the five-panel dress that is my final design.  Now, it feels like I'm coming back around, full circle.  Isn't it funny how life works that way?

I think this will add an elegant touch to the dress, and has the additional benefit of making any fitting issues irrelevant.  As long as the style lines are in the right place, now I have a lot more wiggle room for any small errors.  And that makes me very happy right now!


{Source:  This site has a great tutorial also}


Little Miss loves this idea!  (And I love how she pronounces it cor-SET.)


Till next time,--Ayana


Saturday, September 21, 2013

The Cream Puff Dress Experiment

Testing Patterns with Paper

So, you all know about tissue fitting a pattern, right?  Since I'm not actually using tissue, that's a little difficult.  (Remember what happened with the Golden Goddess Skirt?)

After my pattern drafting from the previous post, I kept mulling over the problems of scale and style, and started wondering (apart from the issue of how the curved seams work in the front) whether my math and two-dimensional approach would even have the look I wanted. 

What happens if what worked on Amanda and her Golden Dress doesn't work on Little Miss and her Cream Puff Dress?  I was especially worried about whether the side seams would actually sit at the sides of the body, and whether the back seam would be in the middle.  Or, would the whole proportion be off? 

Suddenly, a light bulb went off. 

Playing with Paper


Silly goose, just cut out the 1/4 scale paper pieces I've been experimenting with, and "sew" them together with the stapler!  (I did this earlier this summer when I was experimenting with how to draft the bodice for my own dress.  More on this later.)  Then, I'll know if the shape/line/proportion work at all the way I imagined them.

{Cream Puff Dress Paper Mock-Up}


It was a little challenging to get those little pieces of paper to stay stapled, but guess what folks?  It works!  (At least, without a body inside it.)  But my curved princess seam actually did what it was supposed to when "sewed" to a straighter seam, and the straighter seam did not pull the curved seam out of position.  The front three panels look perfectly even at the sides of the "body" and create a flattering waistline.  The back seam falls right in the center and lines up exactly with the center of the front.  It even looks elegant (well, for a paper dress).

Printing the Pattern

I was so thrilled with this outcome, I had another brilliant idea.  Instead of now re-drafting the pattern at 100 percent scale, why not scan my 25 percent scale pattern pieces, blow them up by 400 percent and print them?  I thought I might do this at the print shop, but another light bulb went off.  Duh! I own a printer; why can't I print on multiple pages and tape them together?

So that's what I did.  And here is the result.


{Cream Puff Dress:  Center Back Piece, Tiled Print}


And here's how I did it.


I scanned each pattern piece into a pdf file.  Then, using the snapshot tool, I selected the image area, and selected print.  I chose "print selected image only" (this avoids having too much white space which leads to totally blank pieces of paper), selected "print tiled pages," and tried to collect them from the print tray in the correct order.

As I put the pieces in their correct spaces, I marked and numbered them in clockwise order so I could reconstruct how they fit together at some later necessary point in time.  i.e., center 3, etc.  Each panel required 8 pieces of paper.

Just to make sure, I measure the squares of the graph paper that I had used to draft the pattern.  This way, I could verify that the scale was indeed correct.  Since I had also marked the measurements on the pattern, I also measured those lines to make sure they were correct.  Everything was correct.  Yay!


Then, I learned about the plotter in the library, which prints on immense sheets of paper.  I will use that for my own dress pattern pieces, which will seem super long.

Yay! Making progress!


Till next time,--Ayana

Wednesday, September 18, 2013

Little Miss's Cream Puff Dress

Finding More Beautiful Fabric

I took Little Miss on a special excursion to the fabric shop, so we could pick out matching fabric for our two matching dresses!

Tucked away in an otherwise polyester (not) paradise of "bridal fabrics" that felt like plastic that would smother you and make you sweat, I found ivory silk dupioni!

There was just enough for Little Miss's Cream Puff flower girl dress, and it was on sale!

I asked for 1 1/2 yards (at 54" wide); there was some extra on the bolt, so I got the rest at the "remnant" price of 50% off.  Wow, it was our lucky day!  With a zipper, thread, and two packs of bias tape, I spent a grand whopping total of $34.00.  I'm in shock.

Once I'm confident that the dress will turn out as expected (check out the "rough draft" version, Amanda's Golden Dress), I will order the additional yardage for my own dress!

Drafting the Pattern

When I made Amanda's Golden Dress, I made only one pattern piece, since all measurement points were 1/5 of the circumference--hence, I cut each dress panel five times.

The difference, however, between dolls and women is that women have boobs (duh!).  The seams can't be evenly shaped all around, or the seams might fall in an awkward place.  This isn't an issue obviously with my cute Little Miss flower girl, but I wanted to approximate the changes I would have to make in my pattern drafting to get the same effect I want on my own dress. 

This means that the center panel needs to be specifically placed according to where I want the style lines to fall on the body.  The center panel needs to be 1/3 of the front measurement, except that the top of the panel needs to be 6 inches wide, where each of the side panels needs to be only 3 inches wide.  The waist, hip, and hem points can be equal.  This will give a curved, princess-seam look to the front of the dress.

The two back panels are mirror images of each other, each panel being 1/2 of the back measurement at each point.

This posed some mathematical problems. 

To figure this all out, I started with the hemline, the widest point of each pattern piece--10 inches.  I marked a 10-square line (this is a 1/4 scale experiment) at the bottom of my graph paper, for each of the pieces--1 for the center front, one for each of the two side front pieces, and one for each of the two back pieces.

I then worked my way up, measuring the waistline next.  (The hipline will not be fitted, since the skirt is an A-line shape, so there is no need to measure it.) 

For the waistline, I had two choices:  I could make each pattern piece 1/5 of the total waistline,, making an equal division of the body; or, I could make each of the front pattern pieces 1/6 of the total waistline, and each of the back pattern pieces 1/4 of the total waistline. 

(If you think of the body as an imaginary circle, the front half is divided into three sections, or 1/6, while the back half is divided into two sections, or 1/4). 

Although more complicated, I thought the latter solution would be more likely to have the side seams at the side, and the back seam in the middle of the back.

Moving up to the high waist (which I measured just at the bottom two ribs), I performed the same calculations as for the waist, and drew in the corresponding lines.

Then, I hit a snag.

The problem is, that the top measurements are in a different proportion to each other than the lower measurements.  Here, with the center panel being 6 inches, and each of the side panels being 3, we have a proportion of 1/2 and 1/4. 

This meant that while the center panel had the shape I wanted, for the side panels the top measurement was actually smaller than the high waist and waist measurements, creating an awkward trapezoidal shape.  While the total circumference at each of the points would be correct, I was afraid it would skew the style lines of the dress.  For a corseted/princess seam look, each side of the bodice should look like the opposite sides of a dart, and each should taper roughly the same amount in a mirror image of the other.

(At least, I know it works this way.  I've seen corset patterns where one curved piece is adjoined to a straight piece, but I've never seen anything where one curved piece is joined to another curved piece that follows the same contour instead of the opposite contour.)

So, I tried the alternate method of making each front measurement the same proportion of the top measurement--1/2 and 1/4 of the front total, respectively.  This didn't work either, because as I moved down towards the waist, the differences became too negligible.

So, I had to take an alternate route of problem-solving.

I wrote out each of the measurements in a table.  I started to notice a pattern.  If I took some bits from here and there (namely, the back panels), and added them to the two side front pieces, and then subtracted a bit from here and there (namely, the waist center front) and added this to the back, I was able to get more even numbers that were easier to work with, and which allowed the side front pieces to have an appropriate shape.

Up next, how to figure out whether this will actually have the effect that I want, without cutting into and possibly wasting any fabric.

How do you solve sewing conundrums, dear readers?

Till next time,--Ayana

Sunday, September 15, 2013

Handy Skirt Pattern Drafting Tutorials

Since I had trouble achieving a good fit with the Sew What? Skirts method of pattern drafting--if you remember, the waistbands always came out too big; see my earlier posts on the Cotton Candy Skirt, the Golden Goddess Skirt, and the Sugar Plum Skirt--I decided to search for some other pattern drafting methods.

1.  Burda Style:  a basic sloper for a fitted, straight skirt, based on your measurements, which you can use as a basis for many skirt patterns.  This does not include any ease.

2.  Melly Sews:  a basic sloper for a fitted, straight skirt, based on a combination of taking measurements and toile fitting with pins, plus instructions for how to use this sloper to create patterns for different skirt styles.


{Source}

3.  Fashion-era.com:  a basic sloper for a fitted, straight skirt, with ease added at the hip; this tutorial uses a standard waist and dart size that then you have to adjust to your own measurements.

4.  Wkdesigner:  instructions to draft a gored skirt, with your chosen number of gores/seams.  Caveat:  it doesn't seem to tell you how wide the pattern should be at the hemline, but has you simply continue the waist-to-hipline angle to the hem.  You may want a different shape.  Also, I don't think this pattern will turn out exactly like the skirt shown, which seems to have additional triangular godets inserted between the gored panels, from just below the hip to the hemline.  Also, the final shape will depend on how much drape your fabric has.

{Source}


5.  Sewing Like Mad:  an unusual method for creating a flared A-line skirt with a waistband, plus instructions for creating cool, horizontal, wavy color-blocking.  Although she calls it a "half-circle" skirt, it really isn't.  The slash and spread pattern manipulation technique will get you a similar result to my Cotton Candy Skirt for Little Miss.

{Source}


It would be an interesting project (after the wedding) to compare and contrast the results of following these tutorials.  I am particularly interested in the different ways of handling darts and ease, to find out what works best.

Anyone else interested in a little experiment?  We could create three skirts in six weeks--choosing one of the sloper methods from the first three links, plus making the gored skirt and the flared A-line skirt--and compare and contrast results.

Who's in?  Leave a comment below, or send me an email.

We could start in November, using wintertime fabrics and linings.

After all, who couldn't use three new skirts in her wardrobe?

Till next time,--Ayana


Monday, September 9, 2013

The Sugar Plum Skirt

My Friend From the Wedding Dress Shop (FTWDS) came over so we could work on the Sugar Plum Skirt together. 

Pattern Drafting

{Sugar Plum Skirt:  Basted Side Seams}

She wanted an A-line skirt, so I drafted the fitted waist and darts as normal, added about 4 inches of ease in the hip (based on her experience, that 3 inches were not enough when she recently made herself a skirt out of a knit fabric), and extended the hemline about 3-4 inches beyond the hip point.

Based on my own experience with the Golden Goddess Skirt, I added only 1/2 inch of ease at the waist.


Cutting, Basting, and Fitting


I basted the side seams, and basted in the zipper.  My Friend FTWDS tried in on, and...


{Sugar Plum Skirt:  Basted Darts}


WTF--It's like four inches too big in the waist!


What is going on here?!


Why, after so much careful measuring, are my skirts coming out too big?!

So, I pinned out about four inches, two inches per side (one inch per seam).  I also put a pin in the hip, at the fullest point.  This way I can easily connect the new waist seam to the original hip seam.  This one will be easier to adjust than the Golden Goddess Skirt, since I only have to connect two points instead of re-drawing the whole shape.

Other than this, I'm very happy with how the shape of the skirt came out!

{The Sugar Plum Skirt:  Basted Zipper}


Sew What? Skirts!

 I was curious whether other people who used the Sew What? Skirts! pattern drafting method have had the same problem with skirts coming out too big.  I did an internet search, and found that, indeed, others have had the same problem:


There is a Flickr group devoted to skirts made from this book, and a bunch of people ended up in discussions about how the patterns turned out too big.

I'm not sure what's causing it, but I have a few suspicions:

  • Extra ease at the waistband is not necessary.  At least, not for me and my friends.  We like our waistbands tightly fitted.

    • (caveat:  you might want a tiny bit of ease if you are making a high-waisted skirt, since you do need some room to breathe, and since your measurements above and below that point will be larger, so it still won't fit if you try to move it up or down.  Remember, though, that the ease in your pattern needs to be multiplied by the number of seams.  Thus, for a two-piece skirt--front and back--1/16 of an inch translates to 1/4 of an inch overall.)

  • When the pattern directions tell you to move the waistband side seam upwards by 1/2 an inch and draw a curved line from the center up to this new point, aren't you making the line a bit longer?  Remember what I said just above about adding even 1/16 of an inch?

  • Maybe it has something to do with how the darts are added?  The method is this:  for each 1/2 inch dart, add 1/2 inch to the side seam.  This is repeated for the back also. 

    • However, I read another method of adding darts--let's say you have a 1/2 inch dart in your front pattern piece, and a 1 inch dart in your back pattern piece.  Altogether, you've already added 1 inch to accommodate the darts for the front (both halves=two darts). 

    •  Since you've already added that 1 inch to the front, you subtract that 1 inch from the amount you need to add to the side seam of the back pattern piece.  This method would have you add only one additional inch to the back pattern piece--two 1-inch darts=2 inches, minus 1 inch=1 inch.  Make sense?  (To accommodate two 1 inch darts in the back, the Sew What? Skirts method would have you add two inches to the back pattern piece.  This seems to add a whole extra inch compared to the other method.)
Obviously, I need to learn more about this.  In the meantime, I will just not add any ease at the waist from here on in.

Till next time,--Ayana

Friday, September 6, 2013

Amanda's Golden Dress

I hit a snag with my own wedding dress planning, during and after some health issues.  I was adrift for about two weeks.  Combine that with the problems with fit in the Golden Goddess and Sugar Plum Skirts (stay tuned for more on this one), and I almost gave up. 

Then, I realized that these are just opportunities to go back to square one, sort of.

A Golden Dress for Amanda

To regain confidence, and to test my newest idea, I decided to draft a dress pattern for Amanda, using some scraps from the Golden Goddess skirt.  Since I am re-making my bodice as a five-gore corset-like top (more on this soon), and since I decided not to have a gathered skirt on my own wedding dress, I began thinking:  why not make the whole dress as a five-gore pattern, with a fitted bodice that flares to an A-line shape in the skirt? 

Advantages:  This avoids a waistline seam, which for me would add longer lines to the design.  That's always good for short people.

Disadvantages:  This requires more fabric, due to the width at the hemline and the length of the pattern pieces, and probably has more seams overall.

Advantage:  A smoother waistline.  I can still use an empire waist, and I could still use a tulle overlay that falls from the empire waistline.  The tulle overlay can be placed asymmetrically, so that there is a kind of "cut away" look to the main fabric underneath. 

Possible Idea:  Place crocheted motifs along the hemline and top of the bodice for a lace-like effect.  We'll see if there's time for that, or if I still want to do it later.

Drafting the Pattern

Little Miss and I worked on this together.  I took measurements at three spots:  under the arms (bust--11"), waist (10"), hips (I didn't end up using this measurement).  I also measured the distance between each of these spots.

{Measurements for the Amanda's Golden Wedding Dress}


To create a well-proportioned A-line shape, I doubled the waist measurement for the hip (20), and multiplied the hip measurement by 1.5 for the hemline (30). 

Would you just look at that--it's a Golden Ratio for a Golden Dress (1:2:3)!


{The Golden Wedding Dress:  Measurements for each gore}


Little Miss helped me draw the pattern.  For simplicity, I made each of the gores 1/5 of the measurement at each point.


These measurements should work for any 16" doll; the left column is the width measurement at the top, waist, hip, and hem, and the right column is the distance between each of these points--feel free to use them to create your own Golden Doll Dress!


I showed Little Miss how to draw a center line the length of the whole dress (12").


{Pattern Piece for the Golden Wedding Dress}

Then, we measured lengthwise each of the points where we will need to create a horizontal line--at 1.25" down for the waist, at 3" down for the hip, and then we double-checked our point for the hemline at 12".

At each of the points, I showed Little Miss how to center the ruler at the center line, and draw a horizontal line the correct width.

We then connected each of the points with the straight edge, smoothed the angles with a French curve, and then trued the seams to 90-degree angles at top and bottom.

Pinning, Tracing, and Cutting

Little Miss and I pinned the pattern on a small length of scrap fabric.  I showed her how to use the grading ruler to trace a 1/2" seam allowance around all the edges.

We took turns pinning, tracing, and cutting.

Since each of the gores is identical, we only needed one pattern piece, but cut it five times. 

All of this took a while; about an hour and a half to this point.  Little Miss wanted to play, so I did the sewing.  (She was mad at me though!)

Sewing it Up!

I simply matched the edges, and sewed the seams, pressing each seam as I went.

I accidentally sewed one of the gores with the textured side out instead of the satiny side out--oops!  I didn't worry about re-doing it, but just made that the back panel.

I left the back seam open from the top to the hip for inserting Velcro closures.

I added a thin elastic to the top.  I measured the elastic by pulling it taut around Amanda, cut it, then sewed it close to the top edge of the fabric on the outside, using a medium zigzag stitch, pulling the elastic to stretch it to the fabric length as I went.

{Zigzag stitched elastic edge}


Then, I folded the edge over and topstitched it, again with the zigzag, pulling it taut as I went so that the fabric wouldn't pucker and gather as I sewed.

Now the elastic top band looks decorative.

I didn't hem it, because we needed to go to a party.  Of course, Amanda needed to wear her new dress!  And, to church the next morning.

{Amanda's Golden Wedding Dress really needs ironing at this point!}


I also didn't put the Velcro in yet, or add the decorative sheer over layer yet.  But just wrapping the sheer fabric around the dress, I can tell that it will look even more fabulous when it is complete.


Don't you just love Little Miss' fashion design, showing me where the "tool" should and shouldn't go?


Now Amanda has a Golden Wedding Dress! (almost)


Till Next Time,--Ayana

Tuesday, August 27, 2013

Beautiful Fabric!

We went Fabric shopping!

My Sister, Little Miss, and my Friend from the Wedding Dress Shop went to find fabric for bridesmaids' skirts.  It was brilliant to all go together, so we could compare colors, textures, and find what suited all of us.

Little Miss has a frighteningly good eye for fashion.  I received a lot of design tips for my own dress, which will match hers.

My sister nixed the gathered A-line shape with tulle overskirt--I thought that would be flattering for anyone, but she said not.  So I gave her some of my pattern books to leaf through.  She chose an elegant straight skirt style, modeled on this beautiful skirt from Sew What! Skirts. 
 
Straight skirt with contrast yoke
{Image from:  Sew What! Skirts, p. 86}


We'll call Sweet Sistah's version the Golden Goddess Skirt. 


 The underskirt fabric is shantung satin, shiny on one side and textured on the other, and the overskirt is a sparkly organza. 


It will be beautiful! 


 Color, Texture, and Sparkle


The wedding colors are gold and navy, to match the colors of The Pilot's uniform--


--and plum--one of my all-time favorites (virtually every shade of purple):


As you can see, I bought matching tulle anyway, "for decorations."  That was Sweet Sistah's idea.  She's the artistic one, so I'll let her figure that out.


My goal is to finish Sweet Sistah's skirt before she returns home, or at least have it cut and basted so I can evaluate the fit, and to finish the other two within a week. 

What do you think?  Can I do it?  (Well, I already know the answer to that one, unfortunately.)  So how's this for a question:  what are your favorite fabric colors and textures?

P.S.:  My sewing space is still a mess....


{I love how this photo makes it look like the sewing machine is about to careen off the table!}

Till next time,--Ayana


Tuesday, August 20, 2013

Finally, Success! A Self-Drafted, Cotton Candy Skirt

Yay, Readers!  I did it!

What did I do?, you might ask.  I made a garment that is not only wearable, but, unlike the first Little Miss skirt, it turned out really great.  And, I drafted the pattern myself.  Now, I'm really on my way!

The Cotton Candy Skirt

So, how did this all come about?

First, I did some more experimenting with old t-shirts for fabric.  I used one old t-shirt to make an ultra-fitted skirt (built to Little Misses's own specifications), to wear to drama camp.  This gave me more experience with stretch knit fabrics. 

I used tissue underneath and on top of the fabric, and pinned my self-drafted pattern (which consisted of her exact measurements from waist to knees, with no wearing ease) carefully on top. 

Before removing the tissue, but after I unpinned the pattern pieces, I zigzag stitched the edges of the fabric all around to prevent the edges from rolling, twisting, and jumping around.  I tore off the tissue when done with this step.  I used tweezers to remove the tissue from under the stitching.

Then, I carefully pinned the front and back pieces together, sewed the side seams, added the elastic to the waist, and hemmed.  Voila, a decent skirt, though obviously homemade.

Then, I experimented with drafting an A-line version, using the instructions from Sew What? Skirts!, by Francesca DenHartog, which I had found in the library and read voraciously.  Other than the new shape, my sewing steps were identical to the previous skirt.

Finally, I decided to stop messing around with torn up old clothes as fabric.  I was going to do it right! 

I found a super sweet, bright pink cotton sateen with a light contrast fleur de lis like pattern at the fabric store. 


As I was walking past the remnants bin, I found a sheer fabric with an embroidered design similar to that on the main fabric!  And, there was just enough. So I snatched it up. 


{I placed some white fabric underneath so you can see the swirl in the sheer fabric}


I also found a bright pink velveteen ribbon for the waistband, and a matching, narrow, frilly ribbon to trim the hem.


 Pattern Manipulation

I took the A-line pattern I had drafted, retraced it, slashed it, and spread it to create a fuller A-line shape. 


I also decided to do all the sewing the right way, no shortcuts! 
I made sure to use the correct grain of the fabric ( I didn't even know what this meant when I first started out). 


Pressing Seams


I pressed to one side, then pressed open, turned under, and sewed my seam allowances.  What a difference this makes!  My seams are so neat and pretty!  It's not just idle work, people. 


Topstitching

I topstitched the waistband ribbon, and threaded the elastic through. 

(Previously, I had stitched the elastic to the top of the waistband on the right side, then turned under twice and stitched, with messy but functional results.) 


I basted the curved hem before pressing, turning it up twice and topstitching.  My topstitching is so neat, you can hardly see where it begins and ends! 


I had another sewing revelation--remove the darn arm table for greater control and paradoxically faster stitching.

Instead of hemming the sheer fabric, I finished it with the frilly ribbon, topstitching again.  This lets the sheer fabric hang down a little longer than the main fabric, and lets the frilly ribbon seem to "float" beneath. 


I thought the ribbon would be enough to prevent the sheer fabric from unraveling at the hem, but alas I needed to use some fray check for extra safety.  I then trimmed away any edges not covered by the ribbon.


 Little Miss LOVES this skirt, and so do I! 

Flower Girl Dress Design Inspiration

If only I had made it in cream instead of pink, it could have served as her flower girl skirt for the wedding.  Of course, she wants a dress that matches mine. 

I'll probably use the same skirt pattern, but use tulle as the sheer overlay, insert a zipper instead of the elastic, and trace a bodice from a sleeveless fancy dress she already owns.  Then, I'll add a waist sash in a contrasting color. 

In fact, I might do that before any further work on my own dress, so I can gain some more experience before cutting into my fancy fabric.  I had thought I would save hers for last, since she is growing, but I doubt she would actually outgrow an entire size in the next eight weeks.  Hmmm, let's see....


Readers, how did you reach your sewing Ah-hah moment?  What was your first favorite project?

Till next time,--Ayana

Wednesday, August 14, 2013

How to Get Creative!

What do you do if you want to be creative and make something special for your wedding day, but don't have time to sew a whole fancy dress?

When I first started on this creative journey, I had little to no sewing skills.  I hadn't touched a sewing machine in, oh, twenty years!  And the last thing I tried to make (a skirt from a commercial pattern) got me frustrated, so I never finished it.  I thought patterns were written in some kind of foreign language, so despite wanting to sew I never gave it another shot, until now.

I dusted off my mom's old sewing machine (which I'm embarrassed to say, I've had for about fifteen years now!), got it serviced, and started teaching myself!  We'll get back to that story in the next post.

But this post is about:  what if you have limited time/skills/patience, but still want to make something beautiful?  Consider making half a dress.

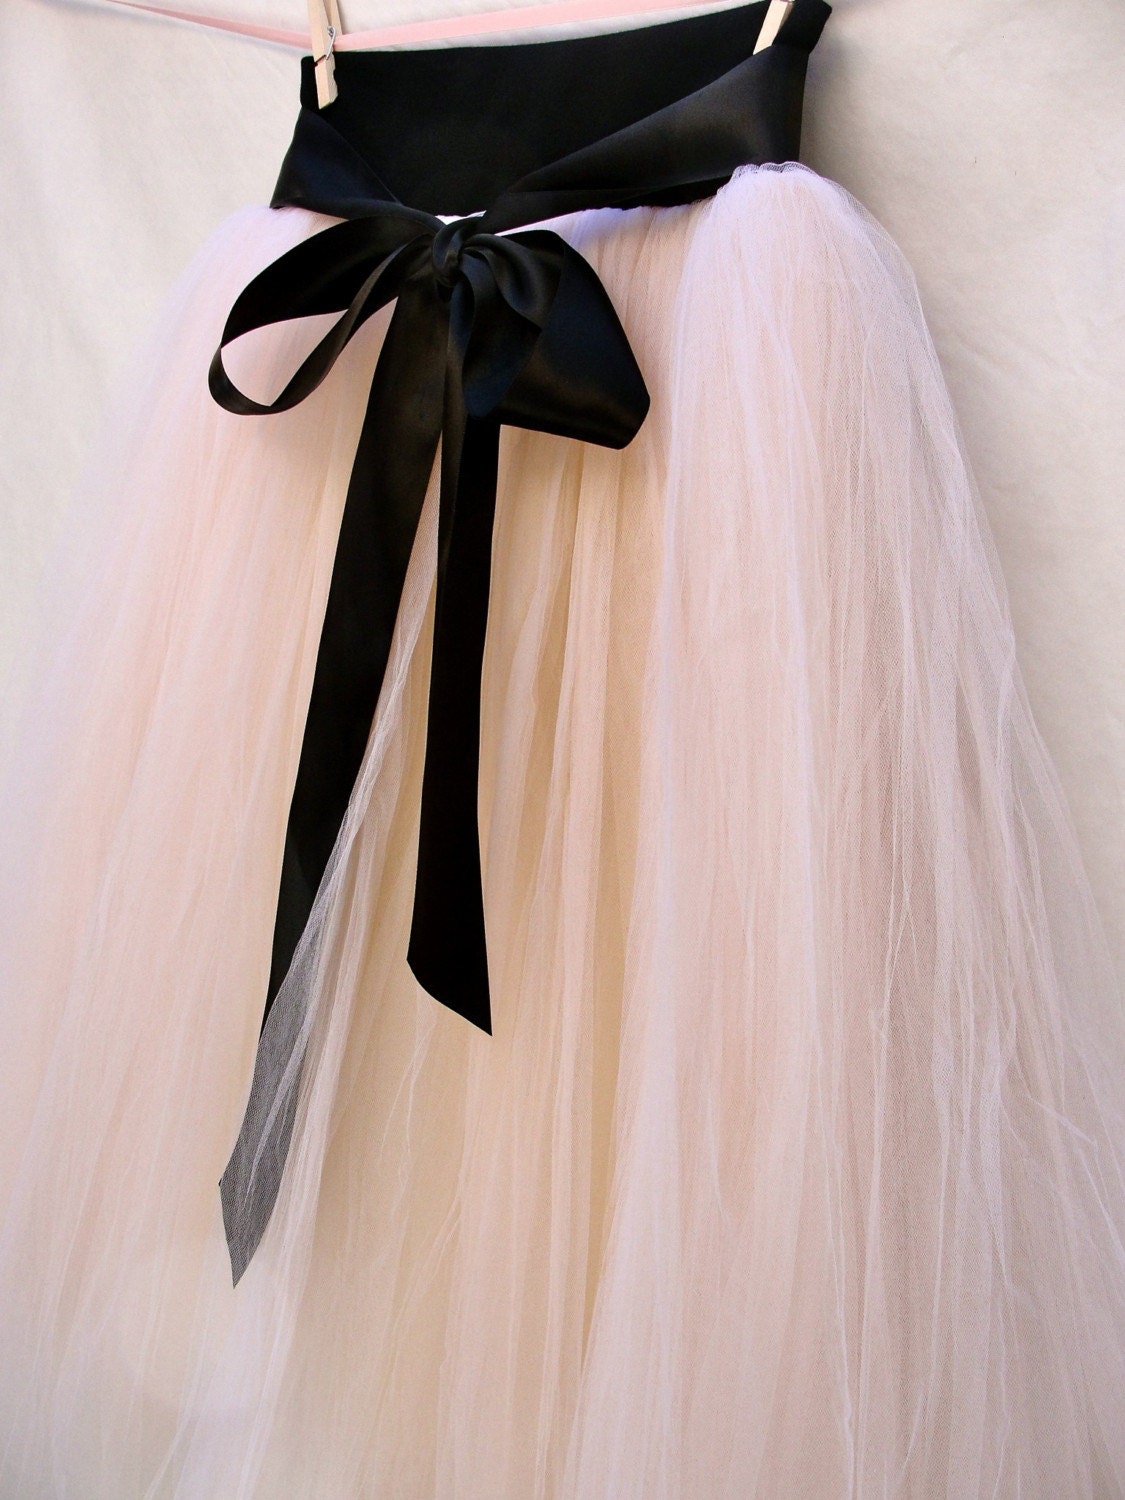
It is much easier to sew a gathered skirt than most people realize.  If your skills aren't up to making a fitted bodice, then why not find a beautiful fitted top and make a skirt to go with it?  If you want a more unified look, you can sew the two pieces together at the waist, or you can use a ribbon or satin sash to cover the waistband (or both).

Here's some inspiration:


This would be beautiful for a casual but elegant wedding, and could be more formal with a longer length (although that would require more body, and likely a petticoat to achieve the proper drape).
 
 
Here's a longer, more formal version:


{source}
note:  I have no experience with this seller.
 
 
You could pair a handmade tulle skirt with a fitted, strapless, corset, or bustier style top.  Wouldn't this one be lovely?:


Once you get creative, the possibilities are endless.
 
What fuels your creativity?


Monday, August 12, 2013

The Fun Part--Choosing a Style!

Today, we'll talk about some of the things you need to consider before you design your dress.  The most fun question is:  what is your style?
 
Spend some time figuring out what you like, and what looks best on you.  I recommend three ways to do this: 
 
1) Raid your closet. 

You probably already have everything you need to know!  Check out your favorite tops, skirts, and dresses to find any common themes. 

I realized that most of my favorite items have some sort of empire waist styling, and I tend to avoid very fitted skirts
 
2) Search online images and bridal collections. 

What types of fabrics, embellishments, and designs grab your attention?  Don't think too much about it--just bookmark your favorites, or pin them, so you can come back to them later.  Do you like lace, silk, tulle, ruching, gathering, peplum, A-line, mermaid, ball gown, tea length?  Embroidery, tiered skirts, applique? 


I discovered that I love flowing, floating designs, and ball gown skirts.  I also like tulle, contrast color waistbands, and lace.  I am open to embroidery and tasteful applique.  (Although, I have memories of tacky applique from eighth-grade home ec--yikes!)


3)  Ready to multiply the fun?  Try on some dresses! 

If you live near a major department store, you can do this easily without making an appointment or asking for a friend to come with you (although shopping with a friend is super fun--just sayin, some people don't like company in the dressing room).  You don't even have to shop in the bridal section, you can try on special occasion dresses with similar style lines. 

Or, you can go all out and try on gowns at bridal shops and boutiques.  You may walk away with your favorite dress in your price range, and save yourself lots of time, and end up feeling like a princess!  If you go this route, bring a friend who can take some photos for review later. 

 
{excuse the lack of hairdo/makeup}

Be prepared to be surprised!  I thought I would love the ball gown look, but after trying some on, there was just too much fabric for my petite height and curvy figure. 

So, what did I end up deciding?  The basic style lines of my design are:  strapless, empire waist bodice, gored A-line skirt with tulle overskirt.  I will attach a contrast waistband sash that curves up into the bodice. 

I may use a layer of lace over the bodice, and I may use some lace trim on the skirt.  If I find an embroidered tulle I like, that matches my contrast waistband, then I will skip the lace.  If I find some tasteful applique designs, and if I use lace, I may combine these on the bodice.  (Check out Claire's design at Errant Pear.)

Isn't this exciting?  Now you have an idea of what you want, and you can develop your design as you go.  You don't have to have everything set in stone. 

Some final questions to ask yourself:  How much time do you have?  We'll talk about how to figure this out, and some other creative options that don't involve a huge project, next time.

What do you think, readers?  What are your favorite style lines?

Happy designing!