Showing posts with label darts. Show all posts

Sunday, September 15, 2013

Handy Skirt Pattern Drafting Tutorials

Since I had trouble achieving a good fit with the Sew What? Skirts method of pattern drafting--if you remember, the waistbands always came out too big; see my earlier posts on the Cotton Candy Skirt, the Golden Goddess Skirt, and the Sugar Plum Skirt--I decided to search for some other pattern drafting methods.

1.  Burda Style:  a basic sloper for a fitted, straight skirt, based on your measurements, which you can use as a basis for many skirt patterns.  This does not include any ease.

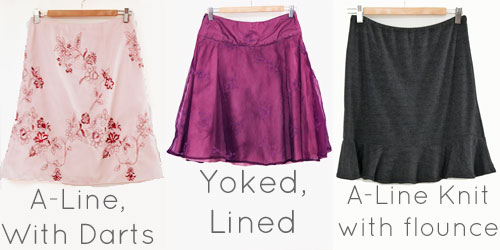
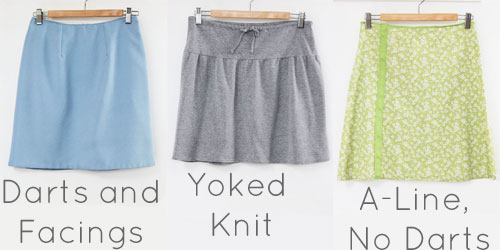
2.  Melly Sews:  a basic sloper for a fitted, straight skirt, based on a combination of taking measurements and toile fitting with pins, plus instructions for how to use this sloper to create patterns for different skirt styles.
{Source}

3.  Fashion-era.com:  a basic sloper for a fitted, straight skirt, with ease added at the hip; this tutorial uses a standard waist and dart size that then you have to adjust to your own measurements.

4.  Wkdesigner:  instructions to draft a gored skirt, with your chosen number of gores/seams.  Caveat:  it doesn't seem to tell you how wide the pattern should be at the hemline, but has you simply continue the waist-to-hipline angle to the hem.  You may want a different shape.  Also, I don't think this pattern will turn out exactly like the skirt shown, which seems to have additional triangular godets inserted between the gored panels, from just below the hip to the hemline.  Also, the final shape will depend on how much drape your fabric has.

{Source}


5.  Sewing Like Mad:  an unusual method for creating a flared A-line skirt with a waistband, plus instructions for creating cool, horizontal, wavy color-blocking.  Although she calls it a "half-circle" skirt, it really isn't.  The slash and spread pattern manipulation technique will get you a similar result to my Cotton Candy Skirt for Little Miss.

{Source}


It would be an interesting project (after the wedding) to compare and contrast the results of following these tutorials.  I am particularly interested in the different ways of handling darts and ease, to find out what works best.

Anyone else interested in a little experiment?  We could create three skirts in six weeks--choosing one of the sloper methods from the first three links, plus making the gored skirt and the flared A-line skirt--and compare and contrast results.

Who's in?  Leave a comment below, or send me an email.

We could start in November, using wintertime fabrics and linings.

After all, who couldn't use three new skirts in her wardrobe?

Till next time,--Ayana


Monday, September 9, 2013

The Sugar Plum Skirt

My Friend From the Wedding Dress Shop (FTWDS) came over so we could work on the Sugar Plum Skirt together. 

Pattern Drafting

{Sugar Plum Skirt:  Basted Side Seams}

She wanted an A-line skirt, so I drafted the fitted waist and darts as normal, added about 4 inches of ease in the hip (based on her experience, that 3 inches were not enough when she recently made herself a skirt out of a knit fabric), and extended the hemline about 3-4 inches beyond the hip point.

Based on my own experience with the Golden Goddess Skirt, I added only 1/2 inch of ease at the waist.


Cutting, Basting, and Fitting


I basted the side seams, and basted in the zipper.  My Friend FTWDS tried in on, and...


{Sugar Plum Skirt:  Basted Darts}


WTF--It's like four inches too big in the waist!


What is going on here?!


Why, after so much careful measuring, are my skirts coming out too big?!

So, I pinned out about four inches, two inches per side (one inch per seam).  I also put a pin in the hip, at the fullest point.  This way I can easily connect the new waist seam to the original hip seam.  This one will be easier to adjust than the Golden Goddess Skirt, since I only have to connect two points instead of re-drawing the whole shape.

Other than this, I'm very happy with how the shape of the skirt came out!

{The Sugar Plum Skirt:  Basted Zipper}


Sew What? Skirts!

 I was curious whether other people who used the Sew What? Skirts! pattern drafting method have had the same problem with skirts coming out too big.  I did an internet search, and found that, indeed, others have had the same problem:


There is a Flickr group devoted to skirts made from this book, and a bunch of people ended up in discussions about how the patterns turned out too big.

I'm not sure what's causing it, but I have a few suspicions:

  • Extra ease at the waistband is not necessary.  At least, not for me and my friends.  We like our waistbands tightly fitted.

    • (caveat:  you might want a tiny bit of ease if you are making a high-waisted skirt, since you do need some room to breathe, and since your measurements above and below that point will be larger, so it still won't fit if you try to move it up or down.  Remember, though, that the ease in your pattern needs to be multiplied by the number of seams.  Thus, for a two-piece skirt--front and back--1/16 of an inch translates to 1/4 of an inch overall.)

  • When the pattern directions tell you to move the waistband side seam upwards by 1/2 an inch and draw a curved line from the center up to this new point, aren't you making the line a bit longer?  Remember what I said just above about adding even 1/16 of an inch?

  • Maybe it has something to do with how the darts are added?  The method is this:  for each 1/2 inch dart, add 1/2 inch to the side seam.  This is repeated for the back also. 

    • However, I read another method of adding darts--let's say you have a 1/2 inch dart in your front pattern piece, and a 1 inch dart in your back pattern piece.  Altogether, you've already added 1 inch to accommodate the darts for the front (both halves=two darts). 

    •  Since you've already added that 1 inch to the front, you subtract that 1 inch from the amount you need to add to the side seam of the back pattern piece.  This method would have you add only one additional inch to the back pattern piece--two 1-inch darts=2 inches, minus 1 inch=1 inch.  Make sense?  (To accommodate two 1 inch darts in the back, the Sew What? Skirts method would have you add two inches to the back pattern piece.  This seems to add a whole extra inch compared to the other method.)
Obviously, I need to learn more about this.  In the meantime, I will just not add any ease at the waist from here on in.

Till next time,--Ayana

Friday, August 30, 2013

The Golden Goddess Skirt

Creating the Golden Goddess Skirt


Okay, so this is the first adult-sized project.  I made a few oopsies. But I think everything will turn out in the end. 

Although I wanted to finish the skirt while my Sweet Sistah was still in town, I realized it might be better to get it mostly done, fit it on her, mark adjustments, and put on the final details when she comes in town before the wedding.  That's my story, and I'm sticking to it.

Drafting the Pattern

First, I took measurements, and using the chart in Sew What? Skirts! drafted the pattern on graph paper.  I like to use graph paper because it is sturdy (which is good when you're cutting the fabric), and it's easy to see whether your seams are trued and your lines are straight.

However, it is not good for "tissue fitting" your pattern (i.e,, when you pin the pattern pieces together on the body to check fit and make adjustments).  More on this later.

I had a bit of trouble with one aspect of the pattern drafting.  I curved the bottom hem to match the curve in the waistband, but then couldn't true the side seam line--it just wouldn't work the way the instructions said it would.

I think A-line skirts are easier to draft.

So, I fudged it a little bit.

Cutting the Fabric

Before cutting, I just wanted to eyeball the fit--here is where pattern tissue paper would have been better.

Oh, no! it looks too narrow!  Maybe I didn't add enough ease? 

Sweet Sistah wanted it fitted, not loose, so where it said "add 2-4 inches of ease," (hip measurement) I added 2.  Where it said "add 1-2 inches of ease," (waist measurement) I added 1. 

[I partly made this decision based on the results of The Cotton Candy Skirt.  Although I had intended a fitted waistband, the amount of ease suggested in the pattern drafting instructions made it too large, so I had to use elastic.]

Since the pattern looked so small, I decided to add an additional 1/2 inch seam allowance at the side when cutting the fabric--a total of 2 inches around.  I didn't want to do a lot of work only to have it not fit at all!

{Basting Darts--
Golden Goddess Skirt}

Basting the Darts


The first sewing task was to baste and sew the darts. 


My Mom had given me some tips over the phone:

  • While basting the darts, take one stitch on one side of the dart leg--from the top towards the point--then cross to the other side, continuing in the same direction, and take another stitch. 

  • Keep alternating sides with each stitch.

  •  When you get to the point, pull the thread taut--magic!  a perfectly formed dart.

{Basting Darts--Golden Goddess Skirt}


No need to try to fold slippery fabric and pin!


  •  Now, just sew from top to bottom of the dart (on the inside of course), making sure to sew off the edge of the fabric at the point. 


{Basting Darts--Golden Goddess Skirt
Here you see where I like to add a pointed tab at the top of the dart
instead of closing it while cutting the fabric.  Now I can simply trim
away the extra fabric to match the contour of the waist.}
  • Remove the basting threads.


Voila--simple, perfect, beautiful darts!


{Basting Darts--The Golden Goddess Skirt. 
The dart still looks a bit puckered, since I machine basted but
haven't sewn final stitches or pressed yet.}
It's fun to see how cloth takes shape with a few simple stitches!

Basting the Side Seams

Now, I simply basted the side seams, and gave the skirt to Sweet Sistah to try on.

{Golden Goddess Skirt:
Basted Side Seam}


WTF!  IT'S LIKE FOUR INCHES TOO BIG EVERYWHERE!

So much for the pattern looking too small.


We held the skirt in place, and I pinned on both sides where the seams should have been.

I removed the skirt and roughly marked the pin line with fabric marker.  (Well, I'm calling it fabric marker; it's really just cheap kid's washable marker--it washes out super easily!)


{Golden Goddess Skirt:
Basted Side Seam with Adjustment Marked}


Then, I traced roughly along those lines with marker.  In theory, I should be able to just re-baste along those lines, right?

Maybe.  Or, possibly, wrong!!

The problem is, if I do that I won't be able to use the paper pattern for cutting the overskirt.  Also, because of the pinning and marking, the distance between the original seam line and the new seam line may not be identical on both sides.

Maybe I shouldn't be so particular?  I know it will fit, at least. 

But maybe it will end up looking lopsided?  What if the distance between the seams and darts are not symmetrical across all four quadrants of the body?


{The Golden Goddess Skirt:
Sudden Dart/Fitting Angst.  This photo is appropriately F-d up!}

This is what Sweet Sistah said would happen.  It would come out lopsided, but I (and now everyone) would feel obligated to wear it anyway. 

These were supposed to be special, hand-created garments, gifts, to be worn proudly!

CRAP I hate it when naysayers are actually right!

On the other hand, if I do simply re-baste and pull out the original basted seams, then I can use the skirt itself as the pattern for the overskirt.

Or, even better, since the overskirt is supposed to be a bit wider than the underskirt--kind of a floaty, sheer, layer--maybe all I have to do is measure the new waistline after I've adjusted the skirt, and gradually connect the new waistline to the old hipline on the paper pattern.

I'm a genius!

It's amazing how writing about something suddenly solves all of its problems.

All week, I've been trying to figure this out.  I had at least three more-complicated ways of figuring this out.  Since I couldn't face it, I set it aside.

Now, instead of having three skirts finished in a week, as I had planned, I only have one slightly messed-up one, that's still not finished.

But now I know how to fix it!


{Golden Goddess Skirt:  As I pinned out the excess, I also fitted the skirt more like a pencil skirt than like a straight skirt, since I thought it would be more flattering.  Here you can see how the contour moves closer to the body at the knee.}


Till next time,--Ayana