Since the gathered skirt from my last post turned out so well for Amanda, I decided to use that experience to practice my new skills making people clothes! I bought some more of the same black and white printed fabric and planned to make a skirt for Little Miss. Then, she wanted me to have one also. So, more fabric.
The version for Little Miss turned out well, but not as shaped as Amanda's. After reviewing the tutorials I had used, I realized my mistake--I had only cut the fabric 1 1/2 times the waist measurement, not 1 1/2 times the hip measurement (or maybe it was 2 times the waist measurement?)! Well, duh! I'm not exactly sure anymore how I had measured Amanda's version since I had read so many different methods, and at the time I had no intention of blogging about it, but the proportions were definitely different. But the version for Little Miss still fits, and looks pretty good.
Here are the two sweeties on the last day of school!
(I also used the remainder of my pink t-shirt to make a matching tube top for Little Miss; there wasn't quite enough of it, so I used some scraps of my white fabric as a facing for the top, allowing it to peek through at the V-neck from the original t-shirt.)
Little Miss wanted me to have a matching skirt, so I decided to oblige. However, I wanted to use this as an opportunity to test out a circle skirt. I looked for tutorials on how to make a circle skirt. However, I somehow messed up; first, it was too big in the waist, so I had to remove one or two of the panels from the skirt. Now, it fit in the waist, but it was more like a 3/4 circle skirt.
I had a really hard time attaching a curved waistband. So, I wasn't looking forward to hemming the skirt. I found Gertie's tutorial on how to use horsehair braid, but when I put the skirt on, I wasn't really happy with how the shape of the skirt looked on me. Needless to say, I never hemmed it. I felt like it actually emphasized my curvy backside. Not in a flattering way. Can anyone say, wadder?
However, I did discover that sewing a line of basting stitches would have helped me match the curves at the waistband; this is a technique I've since used in other places where I've had to turn up a slightly curved area--it's easier to turn up the fabric and press, using the stitching as a guide.
So, I learned a few things--the most important of which is that a circle skirt is out as a possible shape for my wedding dress. I could try it in a drape-y-er (what's the right word here?) fabric, but don't really feel like revisiting this particular experiment. I'll put it on my list for the future.
One of the things I enjoy about sewing (but also sometimes the most frustrating aspect of it) is the learning curve. It's fun to find or invent new ways of doing things, or turning mistakes into positives. I actually enjoy the problem solving.
What about you, readers? How do you cope with mistakes? What are your favorite things about this craft?
Sunday, August 18, 2013
Friday, August 16, 2013
How to Get Started
So, since I had never really sewn before, I decided I needed to start small. Very small. This was back in May; I figured I had plenty of time to fail or change my mind before deciding to go back to the wedding shop and buy one of the gowns I had tried on.
My Friend from the wedding shop dressing room had emailed me the photos, which I forwarded to my mom, sister, and another friend. There was no clear winner. And, while it was fun to try those gowns on, the photos helped me see that I wasn't that ecstatic about how they looked from an outside perspective.
Back to my decision to make my own dress. My mom thought I was crazy--"Why on earth would you want to do that!?" (I think she was kind of panicking).
My sister actually said, "You'll just feel obligated to wear it, even when it comes out lopsided!" (Seriously, did you really just say that? but I did laugh, 'cause it was kind of funny.)
I didn't let them sway me, for the reasons I discussed in my first post. But I realized I was taking a pretty big risk, so I didn't immediately throw all caution to the wind.
Instead, I marched to the nearest fabric store, a chain hobby shop which actually has quite a lot of fabric, mostly cotton prints (probably for quilting, but what do I know? nothing about quilting, that's for sure), and bought about a yard each of three different on-sale fabrics, and a spool of tulle. I also found some fusible seam binding which I thought looked interesting, so I decided to try it out. Oh, and some elastic. And, some Velcro. And, some hooks and eyes. And what do you think I did?
I measured my daughter's (let's just call her Little Miss) American Girl Doll (named Amanda) and started figuring out how to make skirts. This is when I discovered sewing blogs.
I mean, really, there's a whole 'nother world out there I never knew existed! (Well, I guess you, lovely readers, are a part of this world, so you already know this. For me, it was a huge revelation!)
I learned so much from reading smart sewing blogs. Every day I discovered another one. I was so captivated by Gertie's New Blog for Better Sewing, I decided I needed to start from the beginning and get caught up to the present. That only took about three months. I have so many favorites that I can't really list them all here. But these are the tutorials I used for learning how to make gathered skirts: Gertie, Adventures in Dressmaking, and By Hand London.
I made three straight skirts:
![]() |
| Amanda's Straight Skirt #1 {This photo is not the best, but it gives a sense of the fabric's color, sparkle, and sheerness} |
| Amanda's Straight Skirt #2 |
{The third straight skirt is identical to the second, only longer, so I didn't include the photo here.}
a short gathered skirt:
and a tutu skirt:
![]() |
| Amanda's tutu skirt {we're still finding glitter all over the house!} |
and then I cut up an old t-shirt of mine and made a tube top. That was an all-day effort, and then some. But, I learned a lot about what works and what doesn't. The short, gathered skirt I think came out the best.
I was glad I had impulse-bought the seam tape, because at this point I really didn't remember how to use the sewing machine, and adding that on top of learning how to make a skirt (three, no less) would have been a little much.
Also, it turns out that (other than the gathering stiches, and attaching the waistbands, which I did by hand) it was easier to manipulate the small pieces of fabric at the ironing board than it might have been at the sewing machine. Plus, as inexperienced as I was, I think the seams and hems came out straighter than I could have done with a needle and thread. The seam tape actually gave a nice firm edge to turn the fabric over for the hem, for example.
I don't think I'll ever use that stuff on a garment for people, though. That wouldn't really be "sewing," would it? More like, "gluing."
Little Miss was so delighted! I did all of this while she was at school, and didn't tell her about it, so it was a total surprise when she came home. I never expected how much she would love those little skirts!
Little Miss decided that Amanda was going on a date. (I asked her, "how old is Amanda? I thought she was just a baby! At least, she was last week." Apparently, Amanda was sixteen that day.) I realized suddenly that those new little outfits expanded her play imagination opportunities A LOT. And that made me really happy!
What do you think I did next, readers? Next post I'll talk about how I turned those (admittedly still very) new skills into some people clothes.
I'm curious, readers, if you are sewists, how did you get started? Was it intimidating, or did you charge right into it with confidence? What inspired you, and what inspires you today?
I'm not honestly sure what led me to think I could undertake this project; I guess I just sort of knew it was the right thing for me, for no rational reason!
P.S.: Although I plan to include tutorials in future posts, I'm not the best person to teach basic sewing skills, as I'm still learning myself. One of my favorite go-to resources is Tilly's Learn to Sew resources on her awesome blog Tilly and the Buttons. She starts from the very beginning--a very good place to start--with how to set up your sewing machine. To me, that was one of the most intimidating parts. Thankfully, my soon-to-be husband, The Pilot, knows how to sew and got it all set up for me. (Sigh! He can do everything.)
Till next time!--Ayana
Wednesday, August 14, 2013
How to Get Creative!
What do you do if you want to be creative and make something special for your wedding day, but don't have time to sew a whole fancy dress?
When I first started on this creative journey, I had little to no sewing skills. I hadn't touched a sewing machine in, oh, twenty years! And the last thing I tried to make (a skirt from a commercial pattern) got me frustrated, so I never finished it. I thought patterns were written in some kind of foreign language, so despite wanting to sew I never gave it another shot, until now.
I dusted off my mom's old sewing machine (which I'm embarrassed to say, I've had for about fifteen years now!), got it serviced, and started teaching myself! We'll get back to that story in the next post.
But this post is about: what if you have limited time/skills/patience, but still want to make something beautiful? Consider making half a dress.
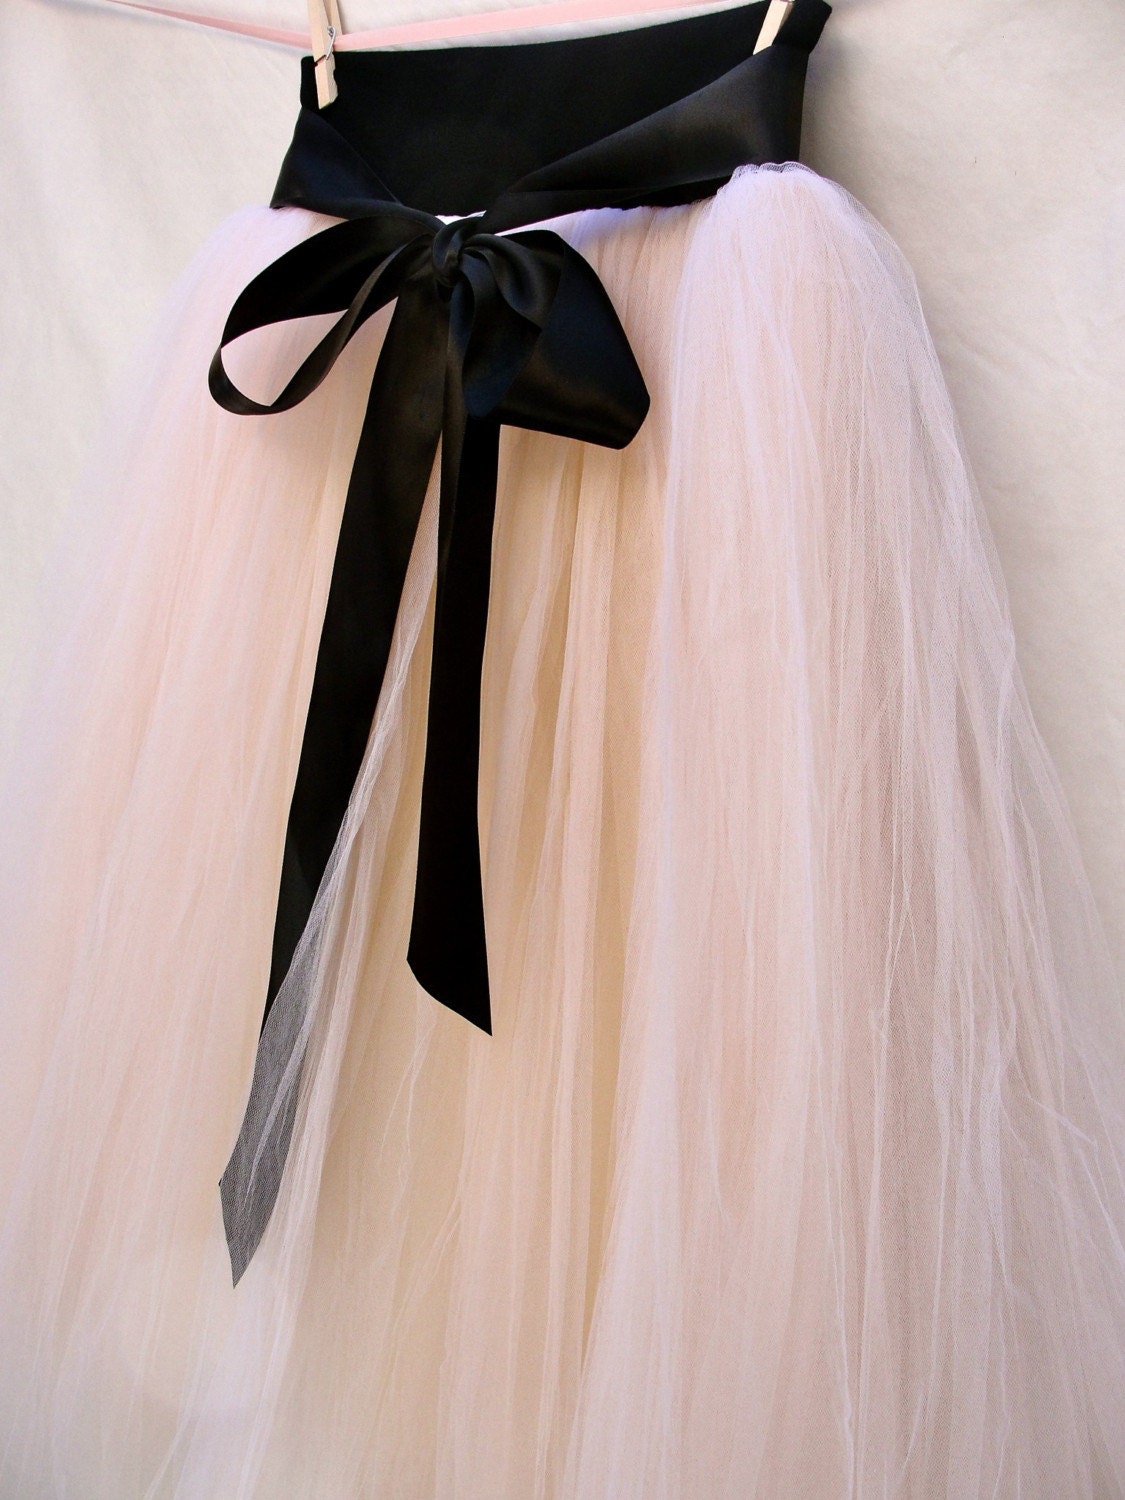
It is much easier to sew a gathered skirt than most people realize. If your skills aren't up to making a fitted bodice, then why not find a beautiful fitted top and make a skirt to go with it? If you want a more unified look, you can sew the two pieces together at the waist, or you can use a ribbon or satin sash to cover the waistband (or both).
Here's some inspiration:
When I first started on this creative journey, I had little to no sewing skills. I hadn't touched a sewing machine in, oh, twenty years! And the last thing I tried to make (a skirt from a commercial pattern) got me frustrated, so I never finished it. I thought patterns were written in some kind of foreign language, so despite wanting to sew I never gave it another shot, until now.
I dusted off my mom's old sewing machine (which I'm embarrassed to say, I've had for about fifteen years now!), got it serviced, and started teaching myself! We'll get back to that story in the next post.
But this post is about: what if you have limited time/skills/patience, but still want to make something beautiful? Consider making half a dress.
It is much easier to sew a gathered skirt than most people realize. If your skills aren't up to making a fitted bodice, then why not find a beautiful fitted top and make a skirt to go with it? If you want a more unified look, you can sew the two pieces together at the waist, or you can use a ribbon or satin sash to cover the waistband (or both).
Here's some inspiration:
{source}
This would be beautiful for a casual but elegant wedding, and could be more formal with a longer length (although that would require more body, and likely a petticoat to achieve the proper drape).
Here's a longer, more formal version:
{source}
note: I have no experience with this seller.
You could pair a handmade tulle skirt with a fitted, strapless, corset, or bustier style top. Wouldn't this one be lovely?:
Once you get creative, the possibilities are endless.
What fuels your creativity?
Monday, August 12, 2013
The Fun Part--Choosing a Style!
Today, we'll talk about some of the things you need to consider before you design your dress. The most fun question is: what is your style?
Spend some time figuring out what you like, and what looks best on you. I recommend three ways to do this:
1) Raid your closet.
You probably already have everything you need to know! Check out your favorite tops, skirts, and dresses to find any common themes.
I realized that most of my favorite items have some sort of empire waist styling, and I tend to avoid very fitted skirts
2) Search online images and bridal collections.
What types of fabrics, embellishments, and designs grab your attention? Don't think too much about it--just bookmark your favorites, or pin them, so you can come back to them later. Do you like lace, silk, tulle, ruching, gathering, peplum, A-line, mermaid, ball gown, tea length? Embroidery, tiered skirts, applique?
I discovered that I love flowing, floating designs, and ball gown skirts. I also like tulle, contrast color waistbands, and lace. I am open to embroidery and tasteful applique. (Although, I have memories of tacky applique from eighth-grade home ec--yikes!)
3) Ready to multiply the fun? Try on some dresses!
If you live near a major department store, you can do this easily without making an appointment or asking for a friend to come with you (although shopping with a friend is super fun--just sayin, some people don't like company in the dressing room). You don't even have to shop in the bridal section, you can try on special occasion dresses with similar style lines.
Or, you can go all out and try on gowns at bridal shops and boutiques. You may walk away with your favorite dress in your price range, and save yourself lots of time, and end up feeling like a princess! If you go this route, bring a friend who can take some photos for review later.
Be prepared to be surprised! I thought I would love the ball gown look, but after trying some on, there was just too much fabric for my petite height and curvy figure.
So, what did I end up deciding? The basic style lines of my design are: strapless, empire waist bodice, gored A-line skirt with tulle overskirt. I will attach a contrast waistband sash that curves up into the bodice.
I may use a layer of lace over the bodice, and I may use some lace trim on the skirt. If I find an embroidered tulle I like, that matches my contrast waistband, then I will skip the lace. If I find some tasteful applique designs, and if I use lace, I may combine these on the bodice. (Check out Claire's design at Errant Pear.)
Isn't this exciting? Now you have an idea of what you want, and you can develop your design as you go. You don't have to have everything set in stone.
Some final questions to ask yourself: How much time do you have? We'll talk about how to figure this out, and some other creative options that don't involve a huge project, next time.
What do you think, readers? What are your favorite style lines?
Happy designing!
Spend some time figuring out what you like, and what looks best on you. I recommend three ways to do this:
1) Raid your closet.
You probably already have everything you need to know! Check out your favorite tops, skirts, and dresses to find any common themes.
I realized that most of my favorite items have some sort of empire waist styling, and I tend to avoid very fitted skirts
2) Search online images and bridal collections.
What types of fabrics, embellishments, and designs grab your attention? Don't think too much about it--just bookmark your favorites, or pin them, so you can come back to them later. Do you like lace, silk, tulle, ruching, gathering, peplum, A-line, mermaid, ball gown, tea length? Embroidery, tiered skirts, applique?
{source}
I discovered that I love flowing, floating designs, and ball gown skirts. I also like tulle, contrast color waistbands, and lace. I am open to embroidery and tasteful applique. (Although, I have memories of tacky applique from eighth-grade home ec--yikes!)
{source}
3) Ready to multiply the fun? Try on some dresses!
If you live near a major department store, you can do this easily without making an appointment or asking for a friend to come with you (although shopping with a friend is super fun--just sayin, some people don't like company in the dressing room). You don't even have to shop in the bridal section, you can try on special occasion dresses with similar style lines.
Or, you can go all out and try on gowns at bridal shops and boutiques. You may walk away with your favorite dress in your price range, and save yourself lots of time, and end up feeling like a princess! If you go this route, bring a friend who can take some photos for review later.
{excuse the lack of hairdo/makeup}
Be prepared to be surprised! I thought I would love the ball gown look, but after trying some on, there was just too much fabric for my petite height and curvy figure.
So, what did I end up deciding? The basic style lines of my design are: strapless, empire waist bodice, gored A-line skirt with tulle overskirt. I will attach a contrast waistband sash that curves up into the bodice.
I may use a layer of lace over the bodice, and I may use some lace trim on the skirt. If I find an embroidered tulle I like, that matches my contrast waistband, then I will skip the lace. If I find some tasteful applique designs, and if I use lace, I may combine these on the bodice. (Check out Claire's design at Errant Pear.)
Isn't this exciting? Now you have an idea of what you want, and you can develop your design as you go. You don't have to have everything set in stone.
Some final questions to ask yourself: How much time do you have? We'll talk about how to figure this out, and some other creative options that don't involve a huge project, next time.
What do you think, readers? What are your favorite style lines?
Happy designing!
Subscribe to:
Posts (Atom)